In our last blog, “How to Wipe a Laptop: A Step-by-Step Guide with eAsset Solutions,” we illustrated the steps required to properly wipe your laptop using DBAN (Darik’s Boot and Nuke). Now, we’ll delve into the next critical step: reinstalling an operating system after wiping your laptop. If you’re wondering how to reinstall an operating system, whether you’re upgrading to a new OS or just starting anew, we’ve got you covered. The process is much easier than you think!
Before we begin, however, it’s important to mention the significance of laptop recycling after wiping your laptop or computer. Instead of tossing your old laptop into the trash bin, we encourage you to consider the environmental impact and opt for responsible disposal methods. Many e-waste recycling centers or organizations specialize in handling old devices (psst…like us!), ensuring their proper disposal or refurbishment. A quick google search will yield many options to explore for laptop recycling or computer recycling near you.
Now let’s get into it!
Step 1: Determine Your Preferred Operating System

Popular Operating Systems
First, begin by deciding which operating system you want to install on your laptop. Windows, macOS and various Linux distributions are popular choices, and you’ll want to consider your needs, aims, compatibility and personal preferences before making a decision on how to reinstall an operating system.
Step 2: Gather Installation Media Or Create A Bootable USB Drive
Depending on your chosen operating system, you’ll need the installation media. This can be a DVD, USB drive or a disk image file (ISO) that you can use to create a bootable USB drive. We recommend visiting the official website of the OS you want to install to obtain the necessary files or purchase the installation media.
Step 3: Backup Your Data

Backup Data!
Before proceeding with the reinstallation process, it’s crucial to backup any important data you might have on your laptop. Since wiping your laptop erases all data, having a backup ensures you won’t lose any valuable files. Cloud services, external storage devices or a combination of both can be used to securely store your data.
Step 4: Configure The Boot Order In BIOS
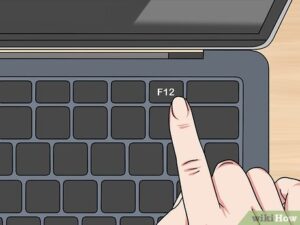
Boot To BIOS
Save any ongoing work and close all applications. Restart your laptop and, while it’s booting up, access the boot menu. The key combination to access the boot menu will vary and depends on the laptop brand and model. Common keys include F12, ESC or Delete. Refer to your laptop’s manual or the manufacturer’s website for specific instructions on how to reinstall an operating system. A general search on Google will yield excellent results as well.
Step 5: Start The Installation Process

Installation Process
Once you access the boot menu, use the arrow keys to select the device that contains the operating system installation media (e.g. DVD drive or USB drive.) Press Enter to confirm your selection and proceed with the laptop wiping process.
Step 6: Format The Hard Drive
As you progress through the installation process, you will come to a point where you need to choose a drive to install the operating system. At this
Warning!
stage, you will have the opportunity to format the hard drive. Locate the drive that corresponds to your laptop’s internal storage and select the formatting option, such as NTFS. Keep in mind, however, that formatting the hard drive will permanently erase all data on it.
Step 7: Proceed With The Installation
After formatting the hard drive, proceed with the installation as indicated by the prompts. Follow the on-screen instructions to set up your operating system, including configuring settings like time zone, username and password. This step is crucial in the laptop wiping process, as it ensures a clean and fresh installation of the operating system.
Step 8: Install Necessary Drivers And Software (if applicable)
Once the operating system installation is complete, you may need to install specific drivers for your laptop’s hardware components. These drivers are usually provided by the laptop manufacturer and can be downloaded from their official website. Additionally, install any essential software or applications you require for your laptop’s optimal functionality.
Step 9: Update And Secure Your Laptop
After installing the necessary drivers and software, connect your laptop to the internet (if not already connected) and run any available updates for the operating system and installed software. Keeping your laptop up to date is essential to ensure security and performance. Furthermore, installing a reliable antivirus program to enhance the security of your laptop is a critical step, as a trusted antivirus solution will offer real-time protection against malware, viruses and other potential threats.

Antivirus Programs
It’s worth noting that regularly updating your operating system, software and security tools will help ensure that you have the latest bug fixes and patches. By taking these steps, you can better protect your laptop and minimize the risk of potential vulnerabilities or cyber threats.
MORE INSIGHTS